Transferring iPhone Videos to Windows: Two Simple Methods
Managing your iPhone’s video library often requires transferring files to your Windows PC. This not only frees up valuable storage space on your device but also provides a secure backup for cherished memories. This guide outlines two straightforward methods for importing videos from your iPhone to a Windows computer.
Method 1: Direct Transfer via USB
This method leverages the simplicity of a direct USB connection. Ensure you have the appropriate Lightning to USB cable.
Step 1: Connect Your iPhone
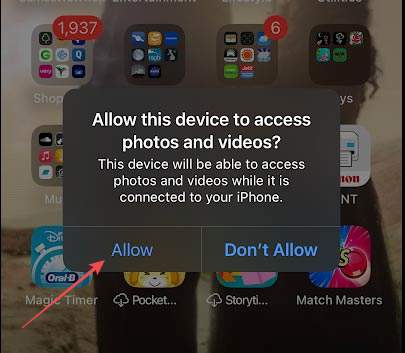
Connect your iPhone to your Windows PC using the Lightning cable. A prompt should appear on your iPhone requesting permission to access photos and videos. Tap “Allow.”
Step 2: Navigate to Your iPhone in File Explorer
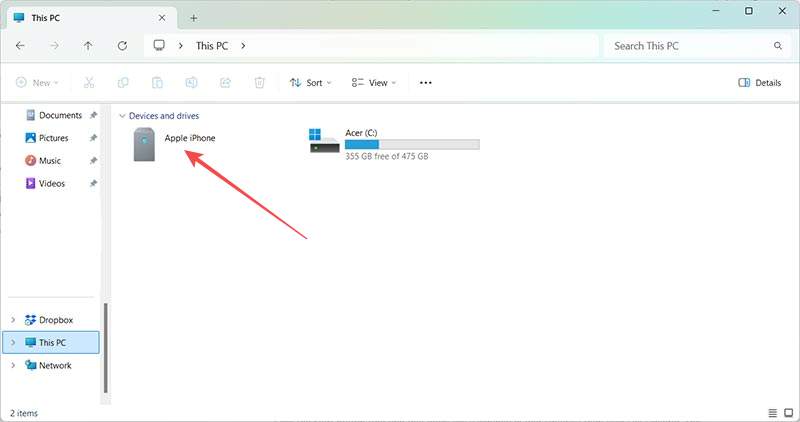
Open File Explorer on your Windows PC (you can quickly access it by searching in the taskbar). Locate “This PC” in the left-hand navigation pane. Double-click the “Apple iPhone” icon.

Step 3: Locate Your Videos
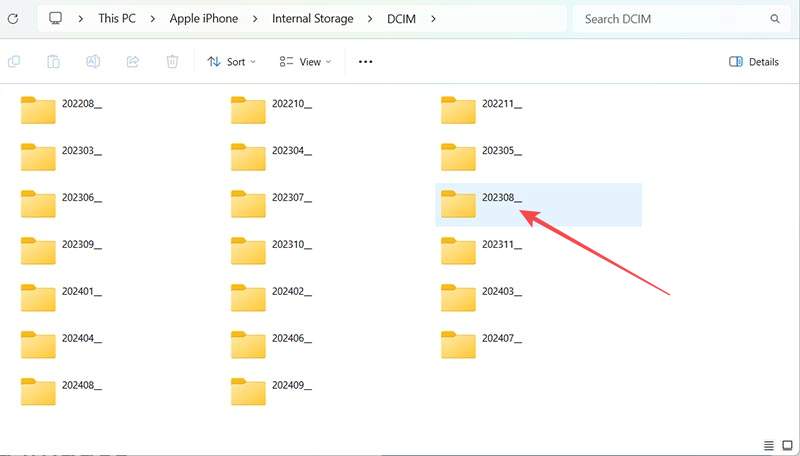
You’ll likely find your videos within the “Internal Storage” followed by the “DCIM” (Digital Camera Images) folder. Inside DCIM, folders are organized by date. Navigate to the desired date to view your videos.

Step 4: Transfer the Videos
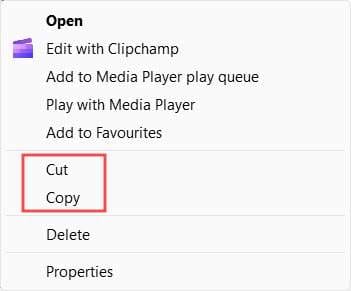
Right-click individual videos and select “Copy” or “Cut” to transfer them to your desired location on your PC. Alternatively, select all videos within a folder and perform the same action. Safely disconnect your iPhone after the transfer completes.

Method 2: Wireless Transfer with Cloud Services
Cloud storage services offer a convenient wireless alternative. Popular options include iCloud, Google Photos, Dropbox, and Microsoft OneDrive.
Step 1: Choose and Install a Cloud Service
Select your preferred cloud storage app and install it on your iPhone from the App Store.
Step 2: Enable Video Backup
Configure the app to back up your iPhone’s videos. Most apps offer automatic backup functionality.


Step 3: Access and Download from Your PC
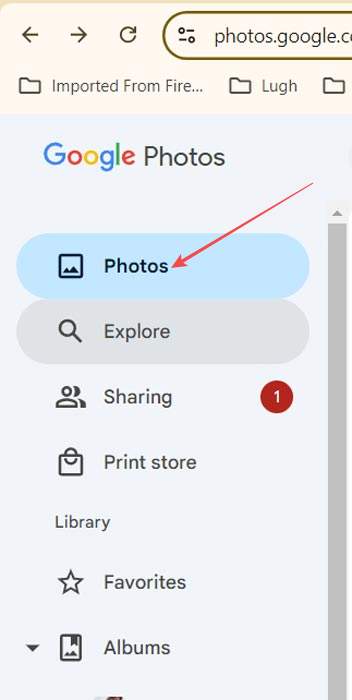
Access the cloud service through a web browser on your Windows PC. Locate the videos and download them to your computer. Services like Google Photos often offer keyboard shortcuts for quicker downloads.

Why Transfer Videos to Your PC?
Transferring videos from your iPhone to your Windows PC offers several advantages. It frees up storage, ensuring your iPhone operates smoothly. It also creates a backup, safeguarding your videos against data loss. Furthermore, sharing videos from a PC can be more convenient than directly from your iPhone. Choose the method that best suits your needs and enjoy the benefits of a well-managed video library.


